Key Takeaways
- A lens protector can shield your phone camera lens from scratches and cracks, and preserve its resale value.
- Before installing, ensure you have a lens protector compatible with your phone model.
- Installing a lens protector is quick and easy with ZAGG. Simply use the provided installer and place it onto the protector tray after cleaning your phone.
You don’t have to be a photographer to know how important a clean lens is for photography. If you know how to install a camera lens protector, you’ll be one step closer to getting those crystal clear shots that make this wonderful pursuit worth it in the first place.
Whether you’re a wildlife photographer or a street photographer, learn all about camera lens protector installation with this easy ZAGG guide.
Why Lens Protection Matters
Gone are the days when you needed a 50mm prime lens and a full-frame DSLR to pull off incredible photos. Modern phones have progressed dramatically over the last decade, becoming impressive cameras in their own right, which is exactly why knowing how to apply a camera lens protector is so important.
Phones have become more powerful, but they’ve also gotten more fragile in some ways. The camera lens is a key point of vulnerability for most phones today. The glass there tends to be much more fragile than the body of the phone or even of your phone screen. While screen protectors are commonplace, few of us ever bother to look into lens protectors. Here’s why you should.
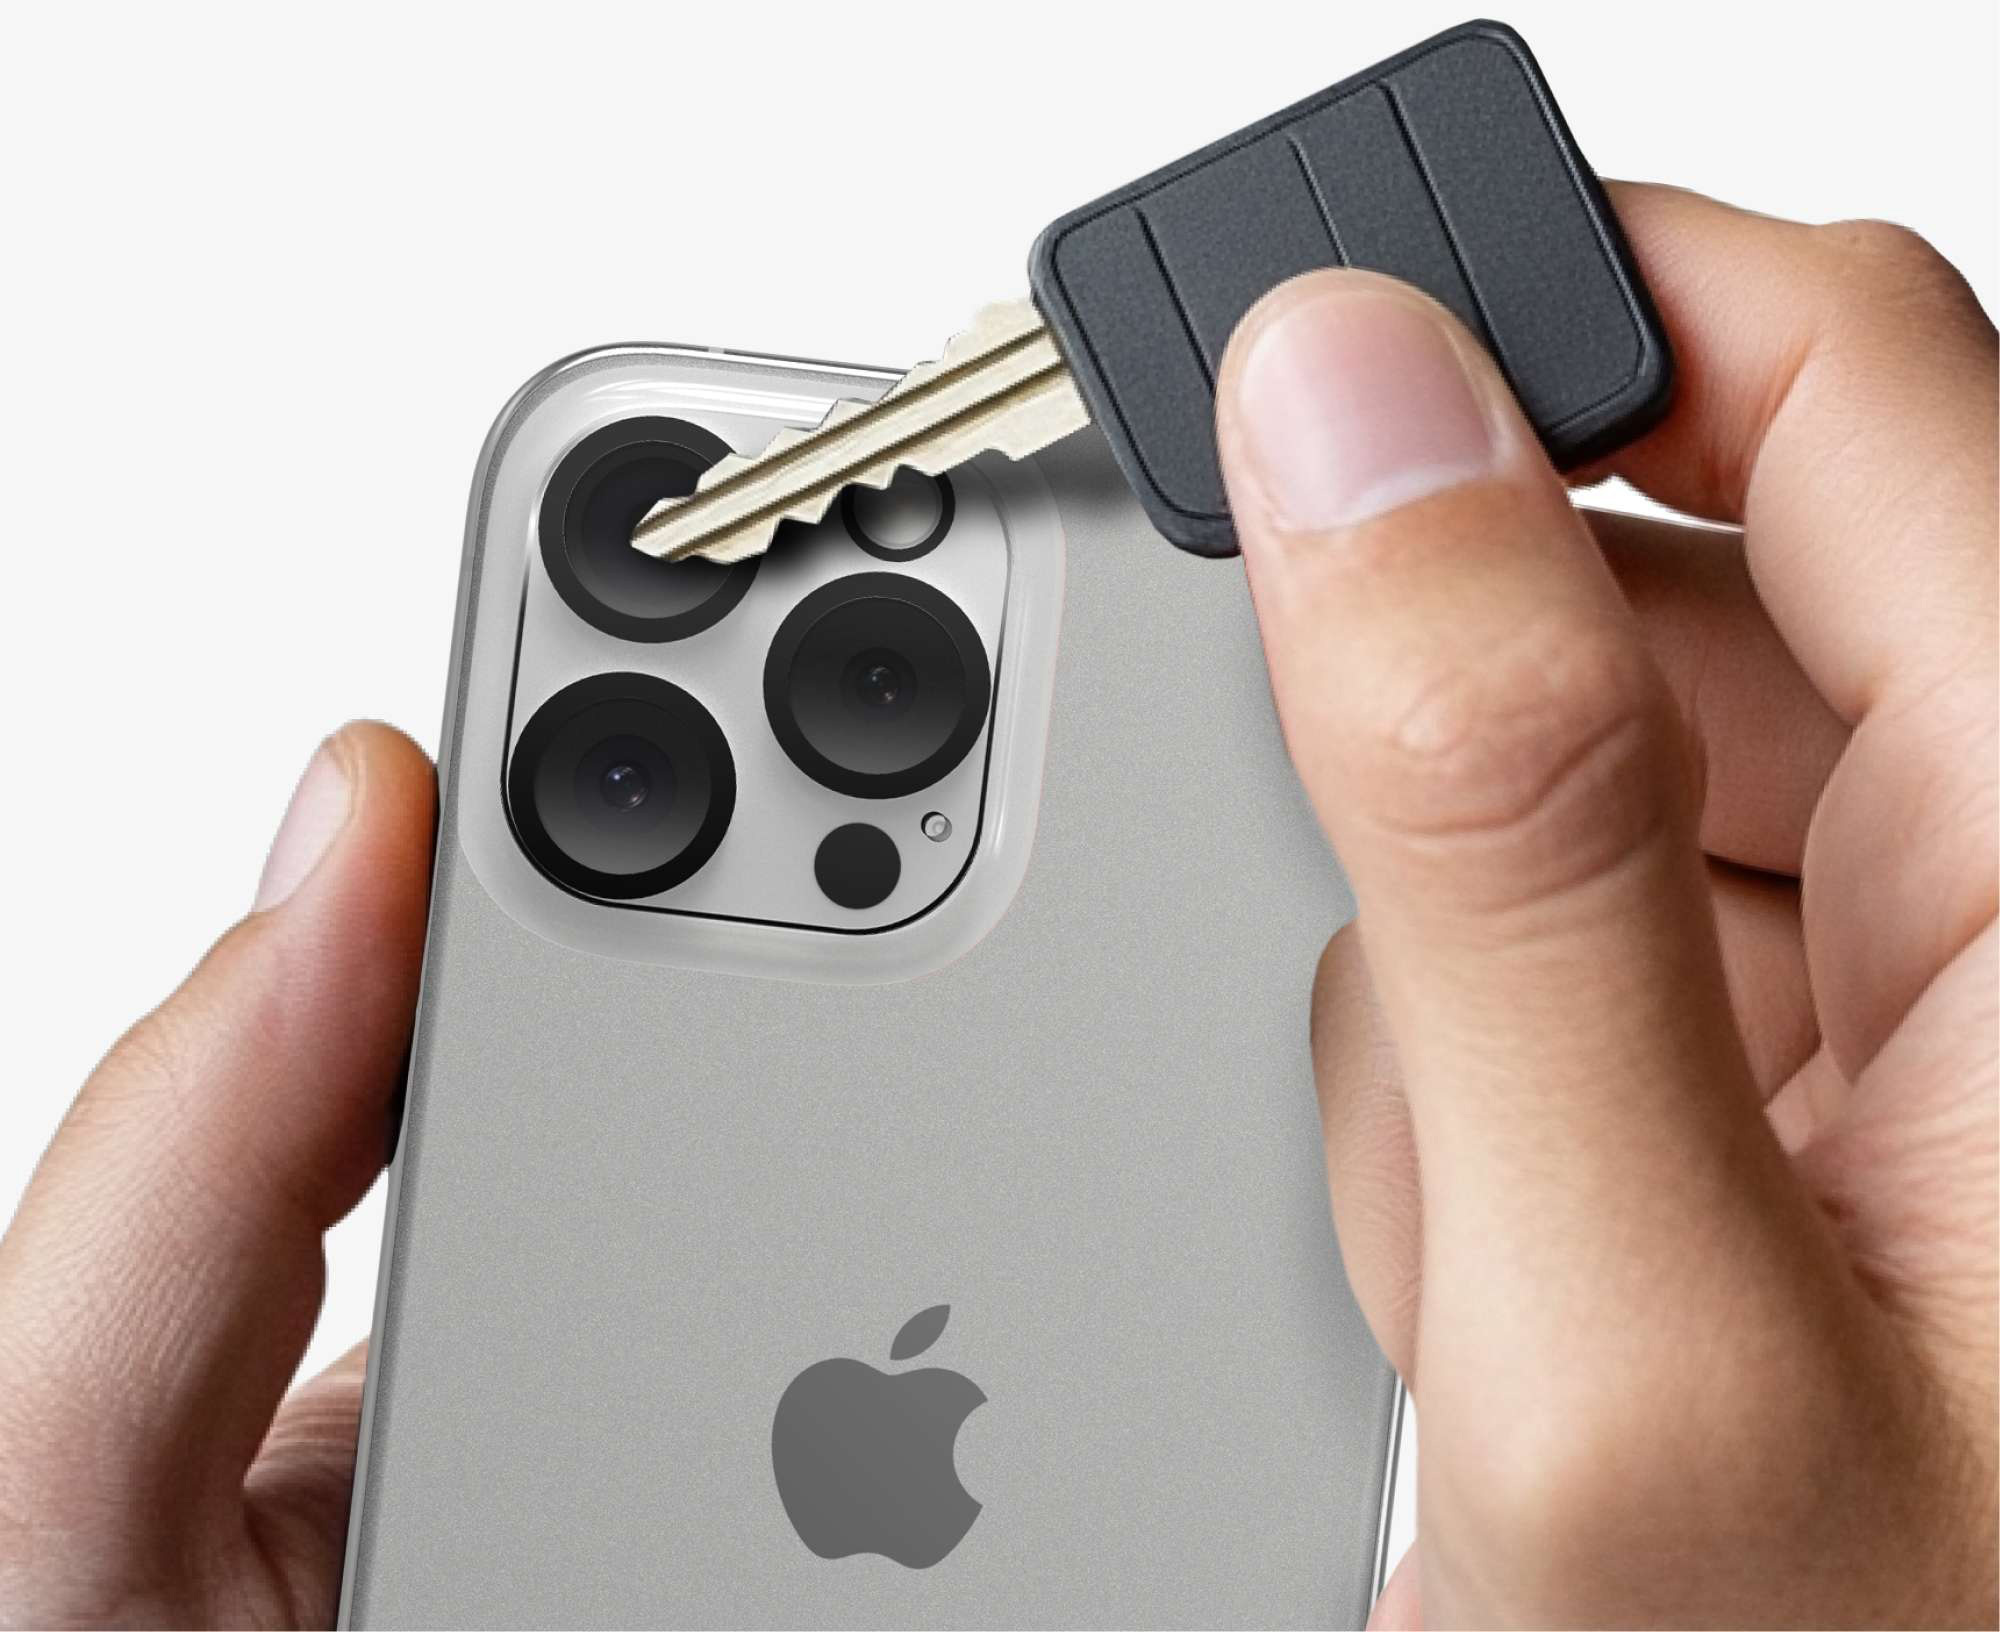
Scratch Prevention
Scratch your camera lens and you’ll have a permanent artifact in every photo going forward. If the scratch is too deep, it could even render your phone's camera practically useless. This is because lens scratches tend to affect the way light is scattered and relayed to your phone’s sensors.
If you know how to apply a camera lens protector, you can slap one on and have a sacrificial barrier against any grievous scratches.
Preserving Resale Value
Knowing how to install a camera lens protector provides a powerful way to protect your phone’s resale value for the future. Most third-party buyers will carefully inspect every part of your phone when it’s time to trade it in, and even a minor lens scratch can cause your phone’s resale value to plummet.
Environmental Damage
If you’re a photographer, you’re already aware that the biggest threats to camera lenses, whether they’re on an iPhone or a DSLR, are invisible. If you don’t know how to apply a camera lens protector and pull your phone out in a sandy or dusty area, you’re exposing it to thousands of microparticles that could damage it.
A camera lens protector installation works to seal the small entry points around your phone lens, preventing small dust particles and moisture from seeping in and wreaking havoc with your photos.
Cost-Effective Prevention
With lens protectors being as affordable as they are today, investing in one is a no-brainer compared to the potential costs involved in replacing your camera lens. A Samsung camera lens replacement can cost up to or even beyond $500, whereas a high-quality ZAGG lens protector is available for $20.
Peace of Mind
This one’s for the real photographers. Knowing how to apply a camera lens protector gives you peace of mind: potentially the most powerful asset you can have as a photographer. Knowing your lens is protected, you’re free to do your best work wherever you are.
How To Install a Camera Lens Protector: What You’ll Need
Ready to get started? Make sure you have these supplies ready before you begin:
- Camera Lens Protector: Please make sure you’re working with a camera lens protector that’s compatible with your phone model. You’ll want to invest in a protector from a trusted brand like ZAGG for the best results.
- Microfiber Cloth: If you’re learning how to apply a camera lens protector, a microfiber cloth is your best friend. You’ll be using this to keep your phone lens clean and dust-free throughout the process.
- Alcohol Wipes: This is used to wipe down the lens and clear it of any smudges, oil stains, and other residue.
- A Clean Workspace: The last thing you want when you’re installing a Google Pixel or iPhone lens protector is for a mass of dust to settle on your camera. Relatively humid rooms work well for camera lens protector installation.
Picking a Quality Camera Lens Protector
If you’re buying from a brand like ZAGG, you won’t need to gather any of these supplies: they’re included with the lens protector! Whether you’re just learning how to apply a camera lens protector or you’re a seasoned pro, ZAGG’s Glass Elite lens protector lineup is the top choice for any flagship phone. With ZAGG, you get:
- 5x stronger protection with advanced glass
- Scratch protection that shields your phone from keys, dust, and other threats
- Crystal-clear images with ZAGG’s signature anti-reflective technology
How To Install a Camera Lens Protector: Step-by-Step
Congratulations, this is the easy part! If you’re working with a ZAGG lens protector, you can finish this process in under a minute.
1) Clean Your Phone Lens
Use the provided microfiber cloth to wipe down your camera lens of any free dust. Then, you can use the alcohol wipe to get rid of any lingering oil stains or smudges. Properly cleaning your phone camera is the most important part of learning how to apply a camera lens protector.
2) Grab the Installer
Grab the camera lens protector installer in one hand, and use the other to remove the backing paper.
3) Place the Installer
Place the installer on the protector tray by lining up the holes in the installer with the pegs on the tray. Once you’ve placed the installer, press down firmly to secure it in place.
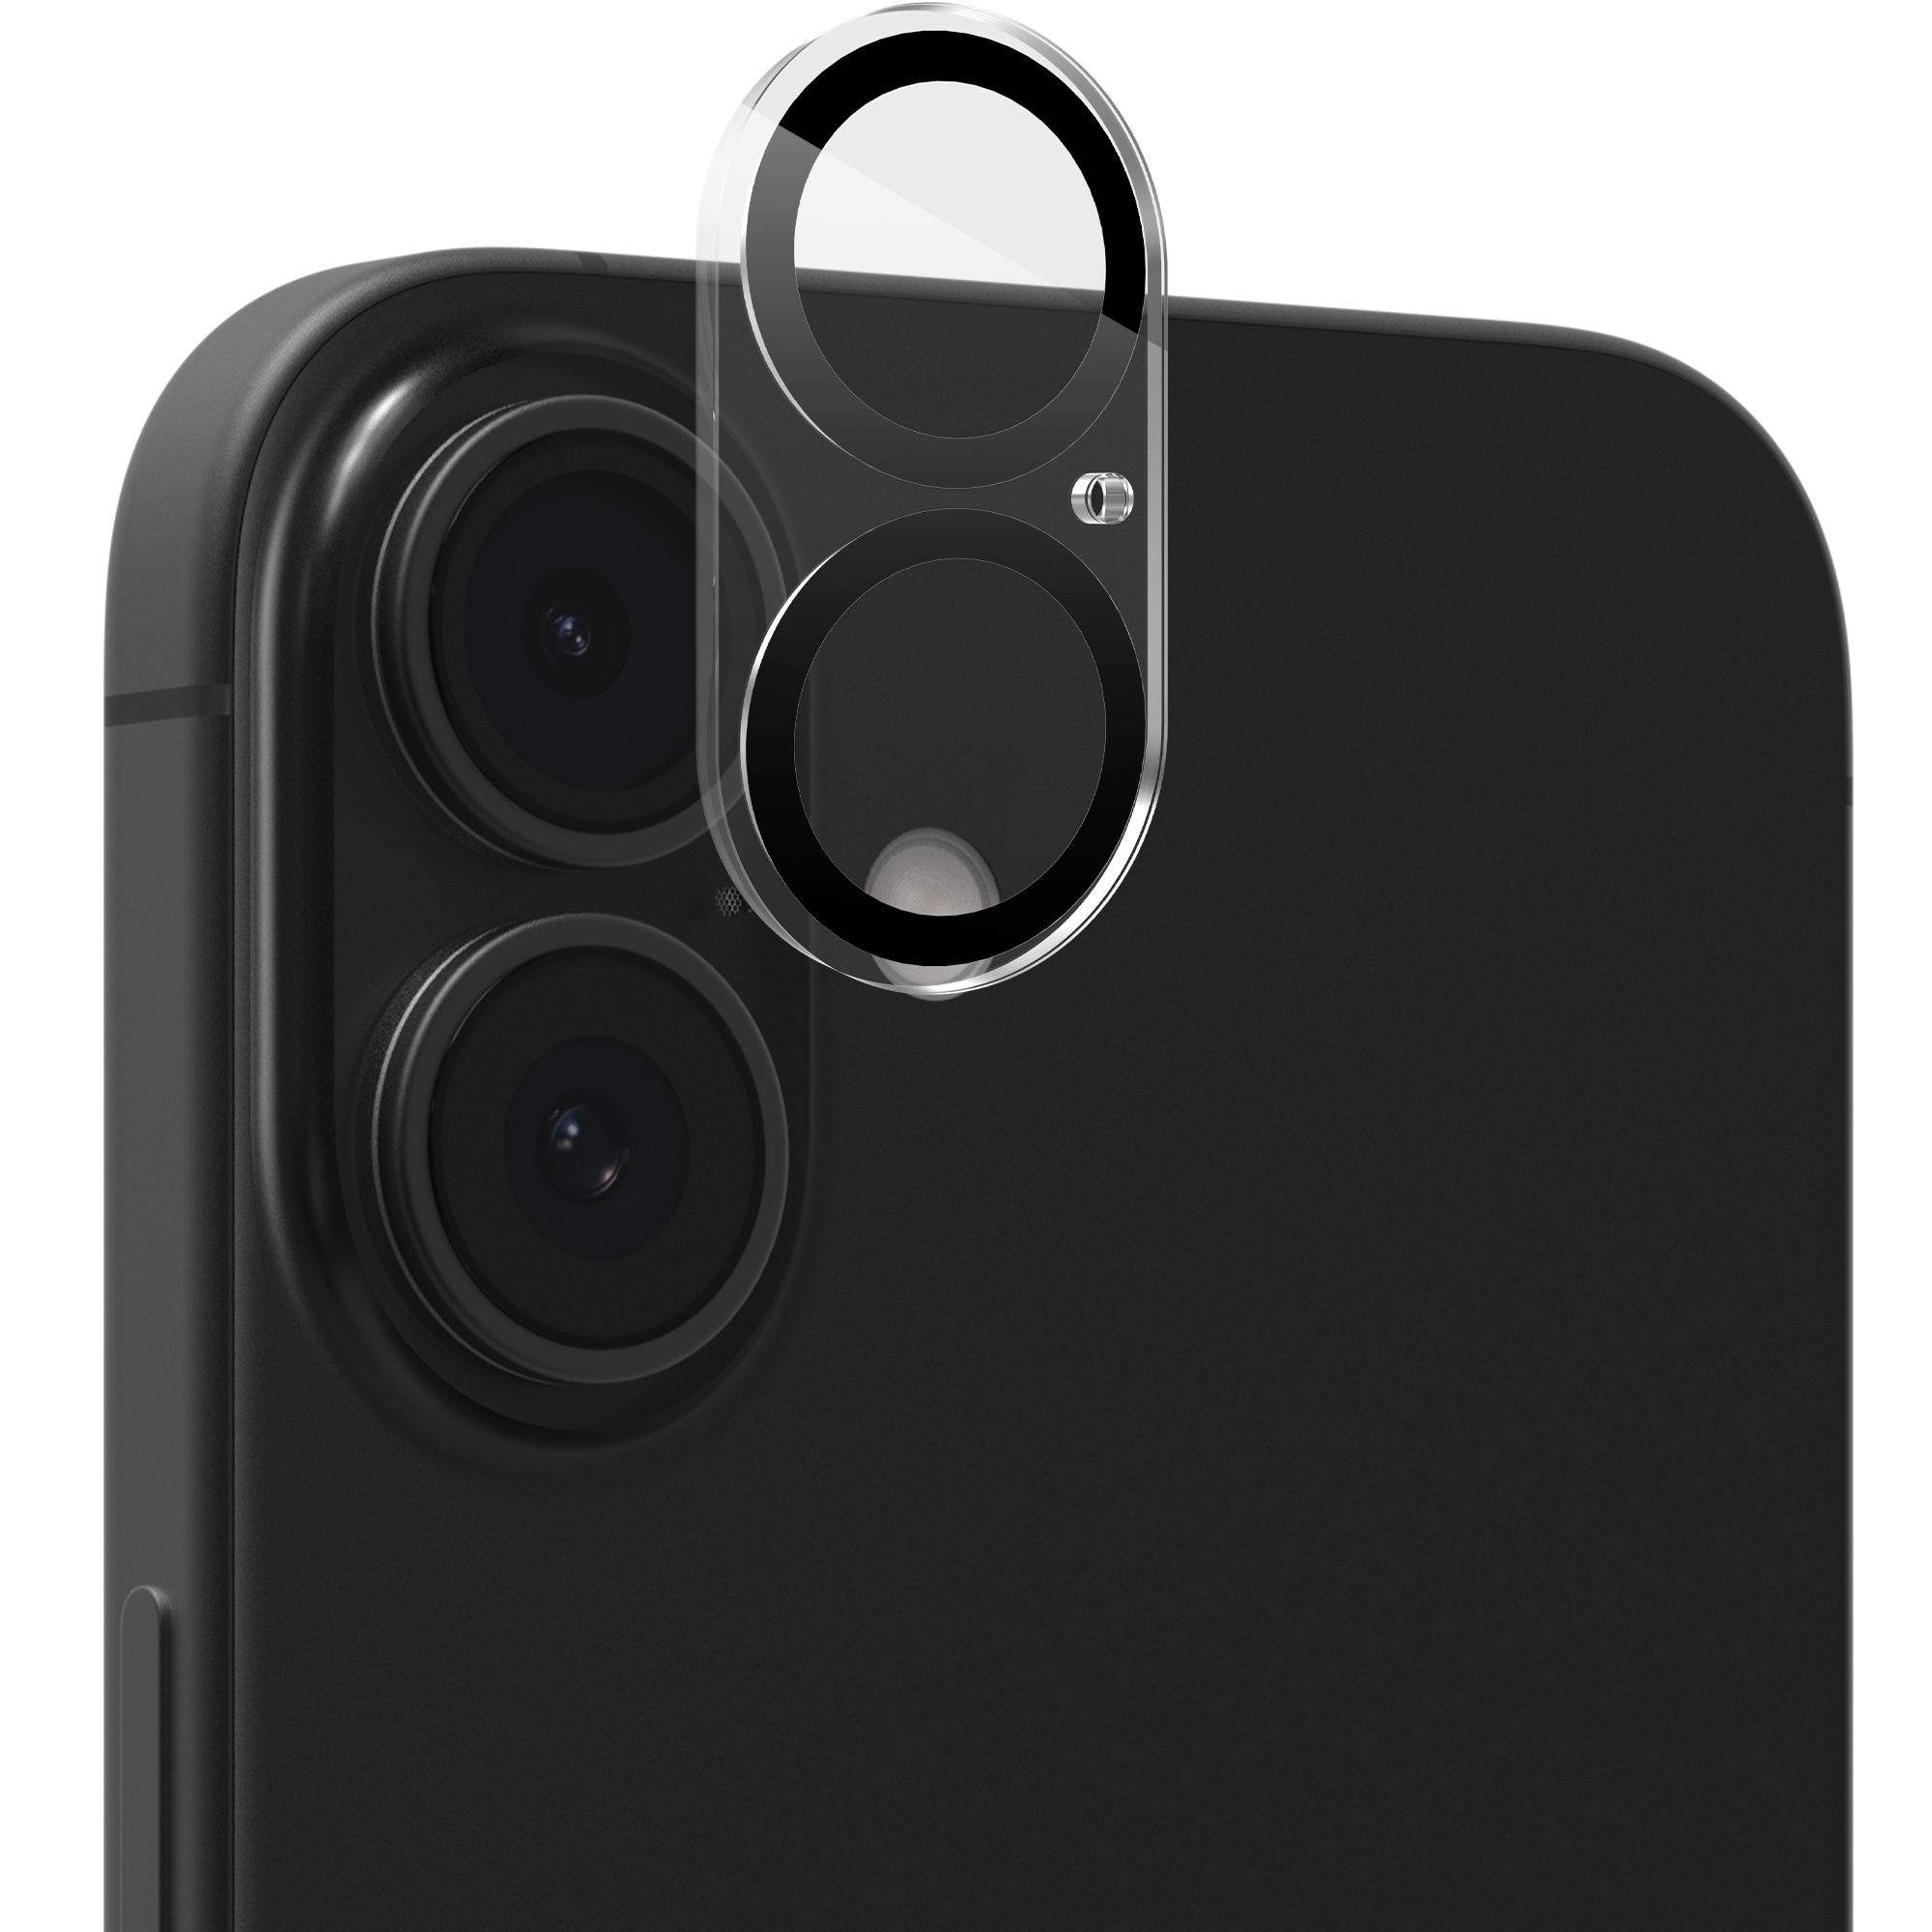
4) Remove Top Shield
Peel off the top shield from the installer. Your protector should now be firmly in place on top of your camera lens.
5) Photograph Away!
You’re all set. Enjoy the peace of mind that only comes with a lens protector, and take your best photos with confidence.
Tips for Best Results
Whether you’re learning how to apply a camera lens protector or even after you’re done, these tips will ensure you get the best possible experience.
Avoid Peeling for Bubbles
If you’re unfamiliar with how to install a camera lens protector, you might be surprised to see a small bubble after installation. These are natural, and they should subside with gentle pressure or even on their own after a while.
In any case, you should avoid peeling and reapplying during your camera lens protector installation. This will weaken the adhesive in the lens protector and can cause problems down the line.
Be Patient
We mentioned this in our XTR4 screen protector guide as well, but you should always be patient if it’s your first time applying a protector, whether it’s on your lens or screen. Rushing when you don’t know how to apply a camera lens protector can lead to misalignments and cause more frustration.
Test Your Camera
Don’t be afraid to take your phone camera for a spin right after the installation! Test your camera in various conditions, if possible, to ensure it’s working properly.
Shield Your Lens Today
The right lens protector can help you see your phone camera in a whole new light and give you the power to take those daring shots. Level up your photography game with a ZAGG camera lens protector today. With FSC-certified materials, elevated designs, and compatibility with all major phone models, you’re only one step away from your next best shot.
Frequently Asked Questions
Loading results...