Key Takeaways
- Before learning more about how to install a ZAGG screen protector, ensure you’re picking the right protector for your phone’s model.
- Gather supplies such as a microfiber cloth, alcohol wipes, and the screen protector, and then move into a clean workspace before you begin.
- When using the EZ Apply® tray (for iPhone 16 and earlier models, plus Samsung and Google devices), place your phone in the tray, peel off the screen protector backing, and align the screen protector over your device using the pegs in the tray as a guide. Press down on the screen protector. Once the adhesive is bonded, you can peel off the top layer of your screen protector, and you’re all set!
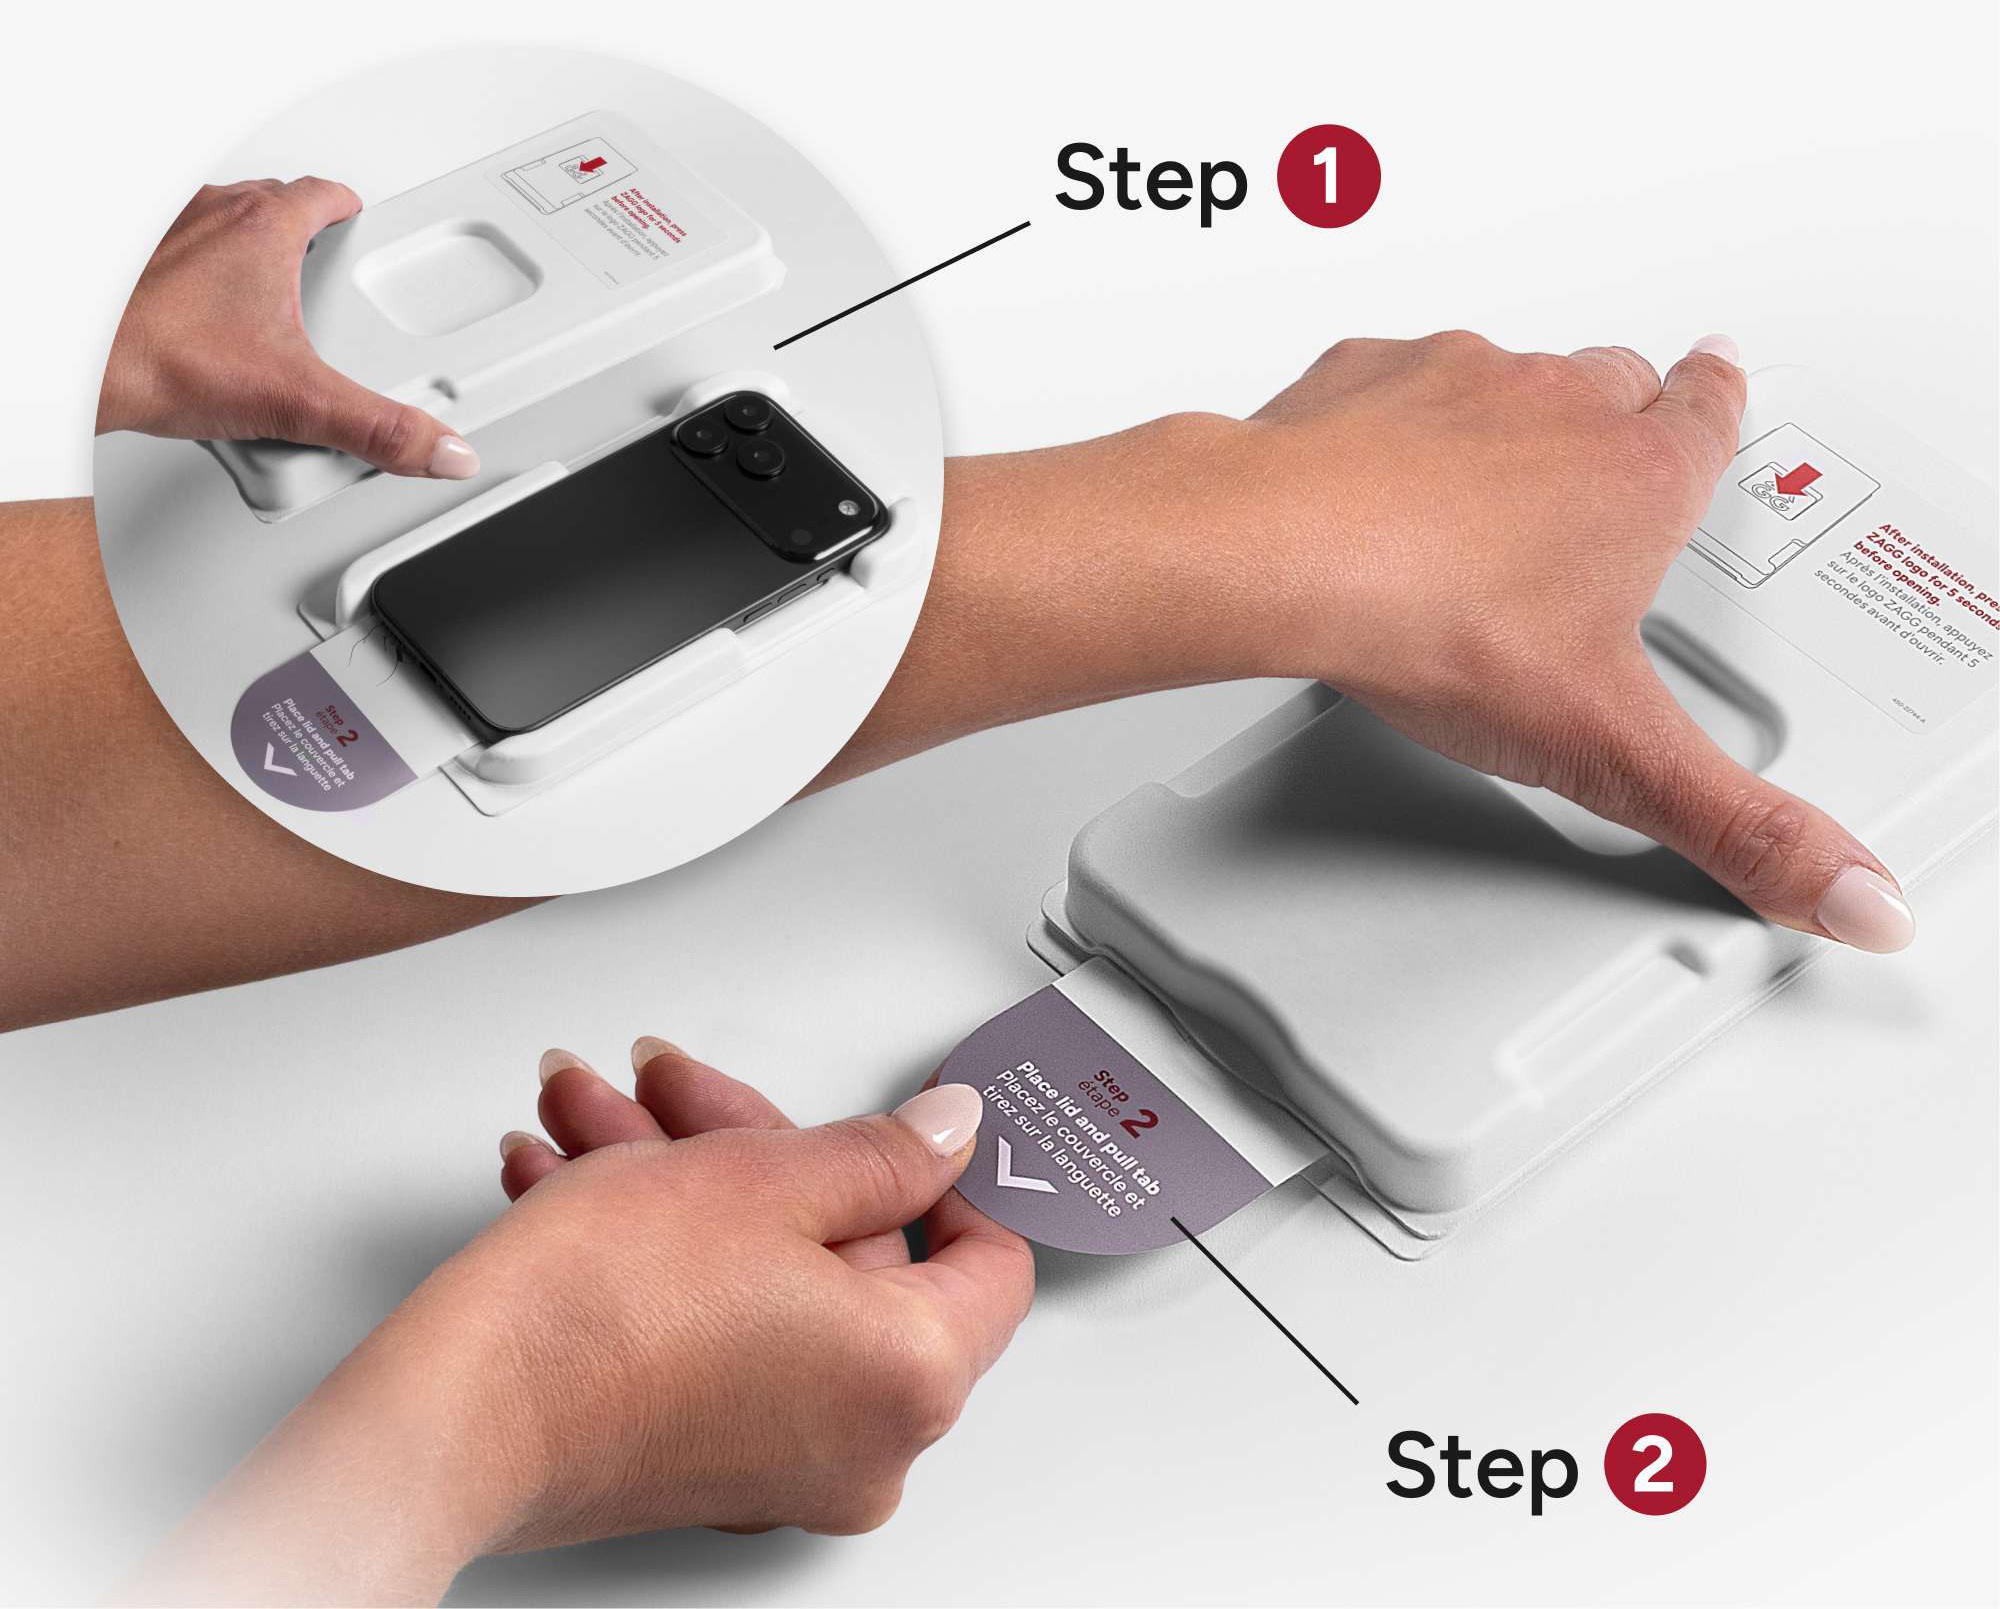
- When using the PerfectFit™ install tray (for iPhone 17 devices), lay your phone screen side down into the bottom tray and place the lid on top. Hold down onto the lid, and pull the labeled tab. Press on the ZAGG logo for 5 seconds to ensure the adhesive is bonded, and then open the tray.
You cracked your old screen protector, painstakingly found a new one for your phone, and now you’re sitting there wondering how to apply it. We’ve been there too. Knowing how to replace a screen protector is almost as important as picking a good one, and we’ll show you exactly how to apply a screen protector perfectly with this quick guide.
Why Proper Screen Protection Matters
As the most exposed part of your device, protecting your phone’s screen matters so much more than most people realize. A screen protector is a vital accessory that safeguards this vital component and can even add additional features to your device. Before diving into how to install a screen protector on a phone, let’s take a closer look at why proper screen protection matters.
Preventing Scratches and Cracks
If you’re not using a screen protector, even a waist-level fall can cause a prominent, permanent crack in your
phone screen. Even minor, everyday abrasion caused by your phone screen rubbing against pocket lint day in and day
out can lead to minor scratches forming over time.
If the Samsung
S25 Ultra’s notorious screen is any indication, newer phones are not any less vulnerable to these
scratches, either.
Luckily, whether you’re an Apple or Samsung user, a screen protector can prevent all of
this by providing constant, edge-to-edge, multilayered protection for your phone. That’s why learning how to
install a screen protector on a phone is so important.
Anti-Shatter Protection
Why does knowing how to replace a screen protector matter? Because in the event of a drop, it’s much better to have your tempered glass screen shatter rather than your bare $400 iPhone display. A broken screen protector can be swapped out in minutes, but a full phone screen replacement can take weeks, if not months, to complete.
Preserving Value
If you know how to install a screen protector on a phone, you can confidently maintain its resale value over the long term by avoiding damage. Even a single scratch can significantly reduce your payout when the time comes and you’re looking to trade in your old phone for a new one.
Gathering Your Supplies
Before jumping into how to install a ZAGG screen protector, let’s quickly go over the supplies you might need to pull off a replacement properly.
- Microfiber Cloth: This cloth is your best when you’re figuring out how to install a screen protector on your phone. It’ll help you clean your phone screen and remove smudges, dust, and lint that linger in the grooves.
- Alcohol Wipes/Cleaning Solution: A small alcohol wipe or cleaning solution (typically isopropyl alcohol) goes a long way in removing oil and adhesive residue from your phone’s screen.
- Alignment Frame: Most screen protectors come with a small alignment frame for easier installation, even if you don’t know how to apply a screen protector perfectly.
If you’re buying a ZAGG XTR4 screen protector, you don’t have to worry about this part at all. ZAGG screen protectors come with a microfiber cloth, a cleaning wipe, an EZ Apply® tray (included with ZAGG screen protectors for iPhone 16 and earlier models, Samsung and Google devices), and a dust removal sticker.
Pre-Installation Preparation
This part’s pretty quick if you’re all set with your supplies. Just follow these tips, and you’ll be ready to learn how to replace a screen protector.
Wash Your Hands Thoroughly
What’s the most frequent tip experts give when asked how to install screen protectors on phones? Maintaining
cleanliness. Your new phone could end up getting scratched incredibly quickly if sharp debris manages to slip under
the screen protector.
Remember to avoid moisturizers after washing your hands, as they can leave a
residue on your phone screen.
Turn Off Your Phone
If you’re learning how to install a ZAGG screen protector, you don’t want to be interrupted by an accidental touch or a notification. Turn your phone off until you’re done (it won’t take long!)
Clean Your Phone
Use the provided microfiber cloth to clean your phone carefully. Gently wipe away loose dust and surface smudges.
Don’t apply too much pressure at this stage.
Next, you can use the alcohol wipe to do a second pass
over your phone. When you’re learning how to install a screen protector on your phone, use a circular motion
to get rid of oil and adhesive stains.
Finally, use a dry microfiber cloth to remove any remaining
moisture after you’ve finished with the alcohol wipe. Check for any smudges or dust particles that might be
left behind under a bright light. If you find any dust particles, use the dust removal sticker to pick up this
debris. You’re half done with learning how to replace a screen protector!
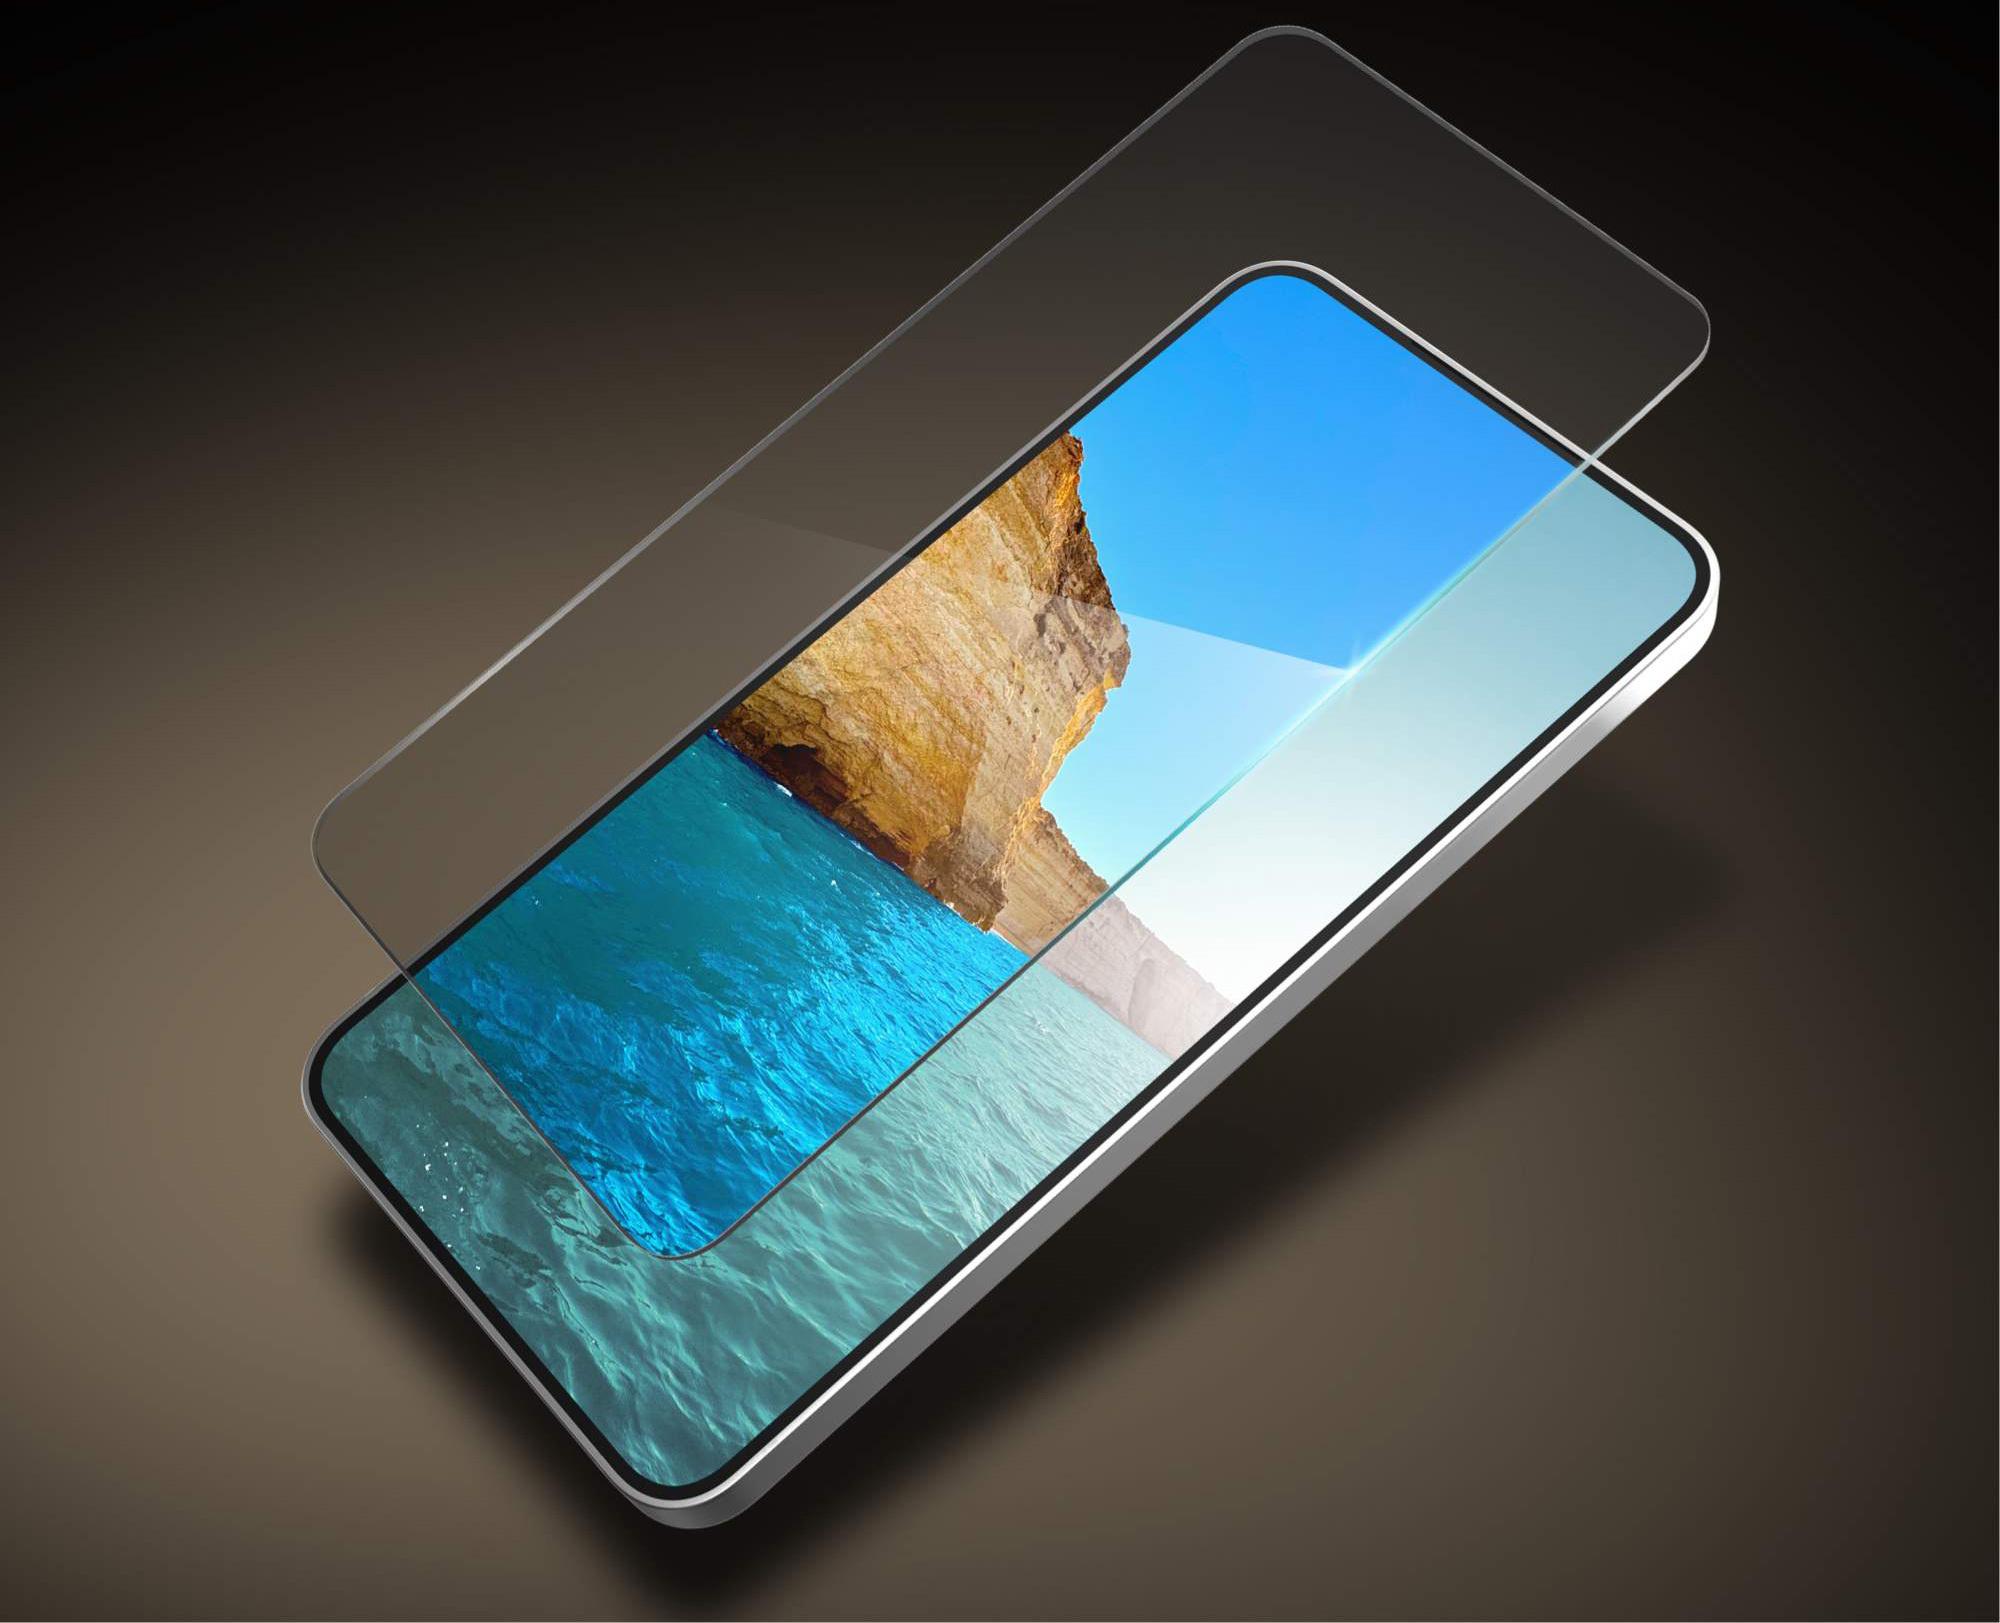
Step-By-Step Installation Guide
This is actually the easy part, especially if you’re using a tempered glass ZAGG screen protector!
Align Your Phone
Gently place your phone into the EZ Apply® tray if you have an iPhone 16 or earlier iPhone model, Samsung, or Google device. You should see two labeled pegs right at the top to help you align your phone properly.
Peel Off The Screen Protector Backing
You’re almost done with learning how to install a screen protector on your phone! Take your screen protector
and peel off the backing sticker labeled 1.
Next, you’ll want to align the screen protector right
over your device using the pegs in the EZ Apply® tray as a guide.
Apply
Once the screen protector is aligned perfectly, just press down in the center of the screen for a few seconds to let the adhesive settle.
Peel Off the Top Layer
Once the adhesive has settled, you can peel off the top layer of your screen protector and wipe your screen down again with a clean microfiber cloth.
If you have a screen protector that comes with the PerfectFit™ install tray (for iPhone 17 devices), installation is a simple two-step process that ensures precise alignment every time. After cleaning your phone screen, lay it screen side down into the bottom tray. Then, place the lid over the top of your phone and while holding down on the lid, pull the labeled tab. After installation, press the ZAGG logo on the top tray for 5 seconds before opening to ensure that the adhesive is bonded.
If you spot any bubbles right away, don’t panic. They’re a relatively common part of learning how to apply a screen protector perfectly. Just wait a few days, and they should go away on their own. If you’re using a PerfectFit™ install tray, we have a bubble-free guarantee, so you won’t have to worry about any bubbles!
Congratulations, you now know how to install a screen protector on your phone!
Troubleshooting Common Issues
Now that you know exactly how to replace a screen protector, let’s look at some issues you might run into after learning how to install a ZAGG screen protector:
- Persisting Air Bubbles: If air bubbles remain even after a few days, you can use a smoothing card or a soft cloth to smooth out your screen. Push outwards starting from the center.
- Misalignment: If it’s a minor misalignment, it’s usually best to just leave it as
it is. You should only have a major misalignment if you picked a screen protector that was incompatible with
your phone model. Follow our ‘how to install a screen protector on your phone’ guide again with the
right protector, and you shouldn’t have any issues.
- Sensitivity Issues: If your phone feels less sensitive or different in any way, just give it a few days. You should get used to the touch sensitivity naturally.
Tips For Success & Finding The Perfect Screen Protector
Get the installation right on your first go with these tips!
- Choose The Right Protector:
- If privacy is a top priority, go with the Glass Elite 4-Way Privacy Screen Protector
- For maximum anti-glare protection and outdoor usage, you can’t go wrong with the Glass Elite Anti-Glare Screen Protector.
- If you’re worried about optimizing your visual experience, the XTR4 Blue Light Screen Protector has you covered.
- For general, reliable coverage, the XTR4 screen protector lineup is unbeatable in terms of protection and additional features.
- Buy From Trusted Brands: Knowing how to install a screen protector on your phone won’t help you if you’re buying from a substandard brand. Follow our ‘how to replace a screen protector’ guide and only purchase from trusted brands like ZAGG to avoid issues like misalignment.
- Avoid Peeling: Peeling off your screen protector and re-applying it should be an absolute last resort. Doing this means potentially introducing dust, debris, and other particles that might cause problems.
Upgrade Your Screen Protector Today
Now that you know how to install a ZAGG screen protector, why not take a look at ZAGG’s extensive lineup of high-quality protectors for your phone? With simple installation solutions, high-quality materials, and an elevated design, ZAGG is the easiest way to give your phone high-end protection.
Frequently Asked Questions
Loading results...